Recently at one of our green projectswe conducted an exercise showing residents how the result of hardscaping projects can be improved by doing things in a structured way and listening to the experts advise. In this case, we improved the construction of an outdoor raised bed. The picture on the top-left shows a raised bed structure built unevenly. On the following pictures we show how this can be improved.
-This exercise aims to:
1) Create consciousness: Exemplify that even the simplest structures have room for improvement
2) Strengthen the China dream: Try to match American and European construction practices for this type of structures
Instructions:
-First have a close look on the raised bed built wrongfully and think about some of the evident defects: unaesthetic, uneven, lack of humidity proof, lack of damping, etc. - How could you solve these defects?
|
| |
|
|
 |
|
 |
| Prototype: Keep it on mind during the construction of the improved structure. |
|
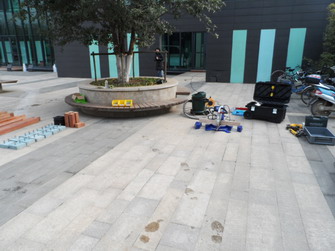
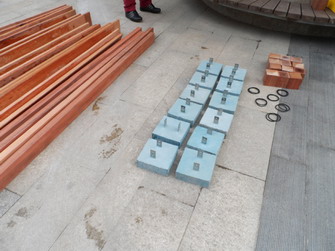
1) Materials and tools.
|
 |
|
 |
| 2) Personal protection equipment including gloves, mask, kneepads, etc. |
|
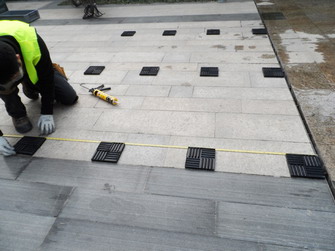
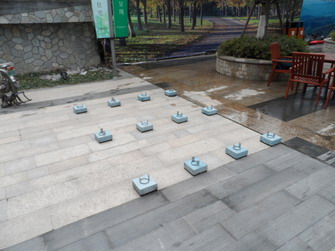
3) Fix the rubber damping pads to the floor withadhesive. |
 |
|
 |
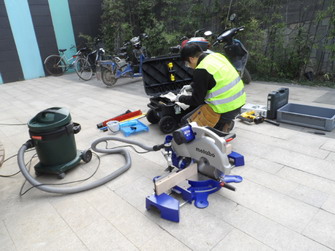
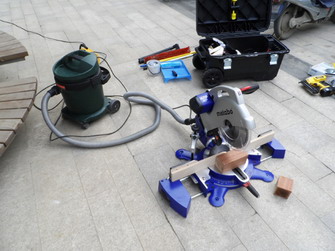
| 4) Cut the wood cubes keeping in mind the need of a drainage slope. Before operating the equipment confirm it’s in good conditions. The cost of construction equipment varies upon brands. Buy the one that satisfy your technical requirements and is most cost effective. |
|
5) Reduce working time by purchasing prefabricated materials. Try to use standardized parts while keeping costs low.
|
 |
|
 |
|
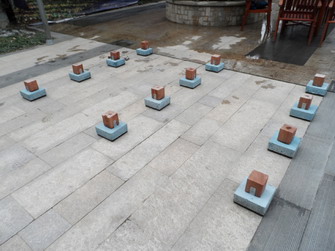
6) Install the prefabricated C30 concrete bases with embedded stainless steel hooks on the rubber damping pads.
|
|
7) Water-proof the wooden base cubes with outdoor grade wax.
|
 |
|
 |
|
8) Install the wooden base cubes.
|
|
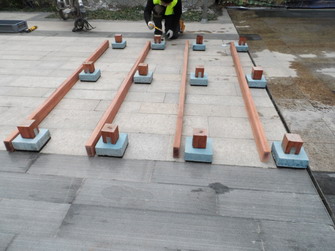
9) Cut the beams.
|
 |
|
 |
|
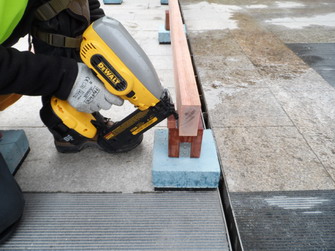
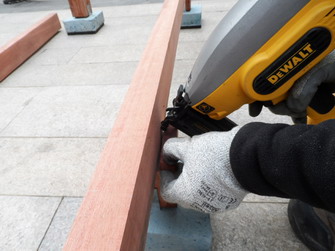
10) Nail the beams using F50 nails.
|
|
|
 |
|
 |
|
11)Attach the floor to the beams using self-tapping screws. Most people can’t tell the difference between different kinds of electric drills. Try using one with a clutch or an impact driver for best results.
|
 |
|
 |
|
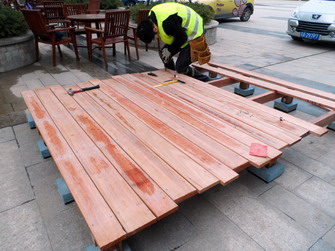
12) Use a saw to cut the floor into even pieces. Clean the dust after you are finished.
|
|
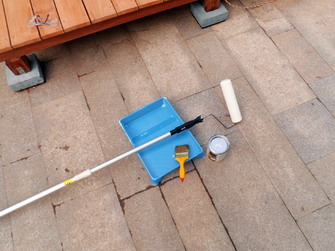
13) Prepare a brush and the tray to coat the wood. The tray is key for applying the coat evenly and you should use it when coating surfaces such as your home walls.
|
 |
|
 |
|
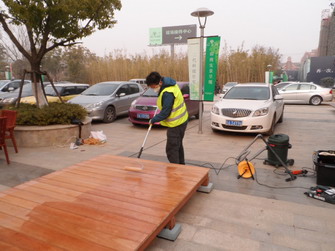
14) Clean the wood surface and coat it with outdoor grade wax.
|
|
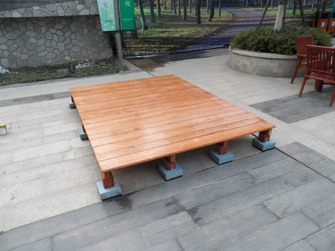
15) Call it a day. Through the construction process, the place stayed clean. Without considering the prep time, our friend spent a total of four hours to finish it.
|
| |
|
|
| |
|
|